Hyundai Venue: Rear Hub - Carrier / Repair procedures
Hyundai Venue (QX) (2020-2025) Service Manual / Driveshaft and axle / Rear Hub - Carrier / Repair procedures
| Removal |
[Rear drum brake type]
| 1. |
Loosen the wheel nuts slightly.
Raise the vehicle, and make sure it is securely supported.
|
| 2. |
Remove the rear wheel and tire (A) from the rear hub.
|
| 3. |
Loosen the screw and then remove the rear drum brake (A).
|
| 4. |
Remove the upper shoe return spring (A).
|
| 5. |
Remove the lower shoe return spring (A).
|
| 6. |
Remove the adjster spring (A).
|
| 7. |
Remove the shoe holder (A) and then remove the rining.
|
| 8. |
Disconnect the parking brake cable (A) from lining (B).
|
| 9. |
Remove the clip (A).
|
| 10. |
Loosen the brake flare nut (A).
|
| 11. |
Loosen the hub mounting bolts and then remove the hub (A) from the torsion
beam.
|
[Rear disc brake type]
| 1. |
Loosen the wheel nuts slightly.
Raise the vehicle, and make sure it is securely supported.
|
| 2. |
Remove the rear wheel and tire (A) from the rear hub.
|
| 3. |
Remove the rear brake caliper.
(Refer to Brake System - "Rear Disc Brake")
|
| 4. |
Loosen the screws and then remove the rear brake disc (A).
|
| 5. |
Disconnect the rear wheel speed sensor connector (A).
|
| 6. |
Remove the hub bearing assembly (A).
|
| 7. |
Loosen the mounting bolts and then separate the extra bracket from the
backing plate.
|
| Inspection |
| 1. |
Check the hub for cracks and the splines for wear.
|
| 2. |
Check the brake disc for scoring and damage.
|
| 3. |
Check the rear axle carrier for cracks.
|
| 4. |
Check the bearing for cracks or damage.
|
| Installation |
| 1. |
Install in the reverse order of removal.
|
| 2. |
After installation, bleed the brake system.
(Refer to Brake System - "Brake system bleeding")
(Refer to Brake System - "ABS system bleeding")
|
 Components and components location
Components
[Rear drum brake type]
1. Brake assembly
2. Rear hub assembly
3. Rear drum
[Rear disc brake type]
1...
Other information:
Hyundai Venue (QX) (2020-2025) Service Manual: Roof Side Molding. Repair procedures
Replacement • Put on gloves to prevent hand injuries. • When removing with a flat-tip screwdriver or remover, wrap protective tape around the tools to prevent damage to components...
Hyundai Venue (QX) (2020-2025) Owners Manual: LKA System Operation
To activate/deactivate LKA system: With the ignition switch in the ON position, press LKA system button located on the instrument panel on the left hand side of the steering wheel. The indicator in the cluster display will initially illuminate white...
Categories
- Manuals Home
- 1st Generation Venue Owners Manual
- 1st Generation Venue Service Manual
- Vehicle Identification Number (vin), Vehicle Certification Label
- Liftgate
- System Setting and Activation
- New on site
- Most important about car
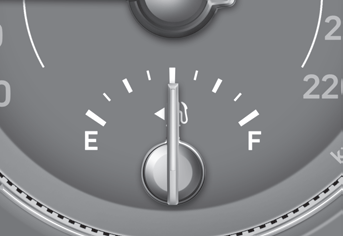
Fuel gauge

This gauge indicates the approximate amount of fuel remaining in the fuel tank.
Information
The fuel tank capacity is given in chapter 2. The fuel gauge is supplemented by a low fuel warning light, which will illuminate when the fuel tank is nearly empty. On inclines or curves, the fuel gauge pointer may fluctuate or the low fuel warning light may come on earlier than usual due to the movement of fuel in the tank.
Copyright © 2025 www.hvenueqx.com


