Hyundai Venue: Blower / Blower Unit. Repair procedures
Hyundai Venue (QX) (2020-2025) Service Manual / Heating, Ventilation and Air Conditioning / Blower / Blower Unit. Repair procedures
| Replacement |
| 1. |
Disconnect the negative (-) battery terminal.
|
| 2. |
Recover the refrigerant with a recovery / recycling / charging station.
|
| 3. |
When the engine is cool, drain the engine coolant from the radiator.
(Refer to Engine Mechanical System - "Coolant")
|
| 4. |
Remove the engine cover.
(Refer to Engine Mechanical System - "Engine Cover")
|
| 5. |
Remove the bolts and the expansion valve (A) from the evaporator core.
|
| 6. |
Press the lock pin and separate the heater hoses (A) from the heater
unit.
|
| 7. |
Loosen the cowl cross member mounting bolts.
|
| 8. |
Remove the floor console assembly.
(Refer to Body - "Floor Console Assembly")
|
| 9. |
Remove the crash pad lower panel.
(Refer to Body - "Crash Pad Lower Panel")
|
| 10. |
Remove both sides of the front pillar trim.
(Refer to Body - "Front Pillar Trim")
|
| 11. |
Remove the cowl side trim.
(Refer to Body - "Cowl Side Trim")
|
| 12. |
Remove the steering column shroud lower panel.
(Refer to Body - "Steering Column Shroud Panel")
|
| 13. |
Remove the steering wheel.
(Refer to Steering System - "Steering Wheel")
|
| 14. |
Remove the multifunction switch.
(Refer to Body Electrical System - "Multifunction Switch")
|
| 15. |
Lower the steering column after loosening the mounting bolts.
(Refer to Steering System - "Steering Column and Shaft")
|
| 16. |
Remove the shift lever assembly.
(Refer to Automatic Transmission System - "Shift Lever")
|
| 17. |
Loosen the cowl cross bar mounting bolt.
|
| 18. |
Disconnect the connectors (A) and the mounting clips in the front pillar.
[LH]
[RH]
|
| 19. |
Disconnect the junction box connectors (A).
|
| 20. |
Disconnect the multi box connectors (A).
[LH]
[RH]
|
| 21. |
Disconnect the airbag control module (SRSCM) connector (A).
|
| 22. |
Separate the blower motor connector (A) and loosen the blower unit mounting
bolts.
|
| 23. |
Remove the drain hose (A).
|
| 24. |
Loosen the bolts and remove the main crash pad and cowl cross bar assembly
(A) together.
|
| 25. |
Disconnect the heater & blower unit connectors.
|
| 26. |
Loosen the heater & blower unit mounting bolt.
|
| 27. |
Loosen the mounting nuts and remove the heater & blower unit (A) from
the crash pad.
|
| 28. |
Loosen the mounting screw and separate the heater unit (B) from the
blower unit (A).
|
| 29. |
Install in the reverse order of removal.
|
 Blower Unit. Components and components location
Component Location
1. Blower unit assembly
Component Location
1. Intake seal
2...
 Blower Motor. Repair procedures
Inspection
1.
Connect the battery voltage and check the blower motor rotation.
2.
If the blower motor does not operate well, substitute with a known-good
blower motor and check for proper operation...
Other information:
Hyundai Venue (QX) (2020-2025) Owners Manual: Luggage Net Holder
To keep items from shifting in the luggage compartment, you can use the 4 holders located in the luggage board to attach the luggage net. Make sure the luggage net is securely attached to the holders in the luggage board. WARNING Avoid eye injury...
Hyundai Venue (QX) (2020-2025) Service Manual: Rear Coil Spring. Repair procedures
Removal 1. Loosen the wheel nuts slightly. Raise the vehicle, and make sure it is securely supported. 2. Remove the rear wheel and tire (A) from the rear hub. Tightening torque : 107...
Categories
- Manuals Home
- 1st Generation Venue Owners Manual
- 1st Generation Venue Service Manual
- Automatic Door Lock and Unlock Features
- Child-Protector Rear Door Locks
- Liftgate
- New on site
- Most important about car
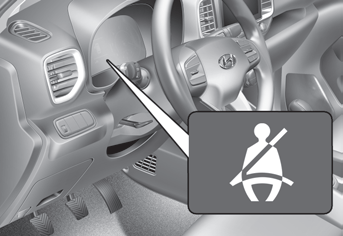
Seat Belt Warning Light
Seat belt warning light (for driver’s seat)

As a reminder to the driver, the seat belt warning light will illuminate for approximately 6 seconds each time you place the ignition switch to the ON position regardless of belt fastening. However, if the seat belt is unfasted, a warning chime will sound for approximately 6 seconds.
Copyright © 2025 www.hvenueqx.com


