Hyundai Venue: Power Door Locks / Power Door Lock Actuators. Repair procedures
Hyundai Venue (QX) (2020-2025) Service Manual / Body Electrical System / Power Door Locks / Power Door Lock Actuators. Repair procedures
| Inspection |
Front Door Lock Module Inspection
| 1. |
Remove the front door trim.
(Refer to Body - "Front Door Trim")
|
| 2. |
Remove the front door module.
(Refer to Body - "Front Door Module")
|
| 3. |
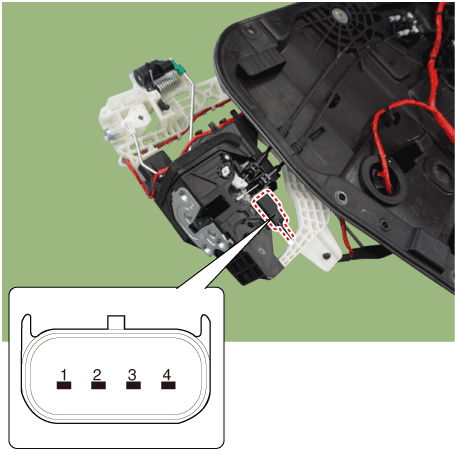
Disconnect the connectors from the actuator.
|
| 4. |
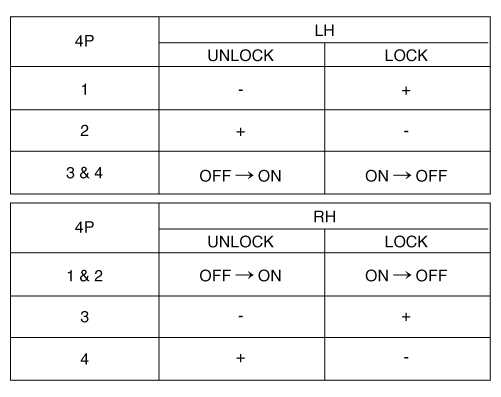
Check actuator operation by connecting power and ground according to
the table. To prevent damage to the actuator, apply battery voltage
only momentarily.
|
Rear Door Latch Inspection
| 1. |
Remove the rear door trim.
(Refer to Body - "Rear Door Trim")
|
| 2. |
Remove the rear latch.
(Refer to Body - "Rear Door Latch")
|
| 3. |
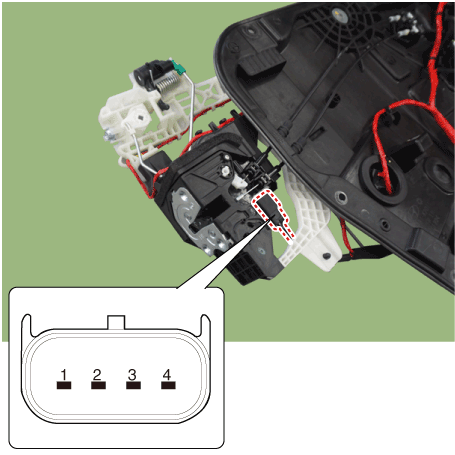
Disconnect the connectors from the actuator.
|
| 4. |
Check actuator operation by connecting power and ground according to
the table. To prevent damage to the actuator, apply battery voltage
only momentarily.
|
Door switch
| 1. |
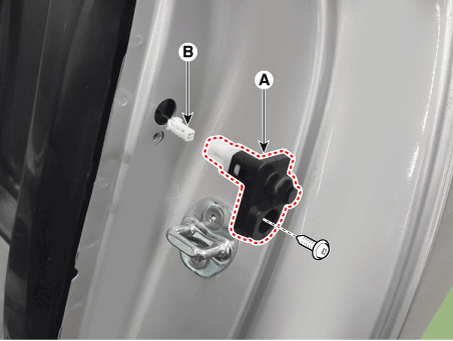
Remove the door switch (A) after loosening the screw and disconnecting
the connector (B).
|
| 2. |
Check for continuity between the terminals in each switch position according
to the table.
|
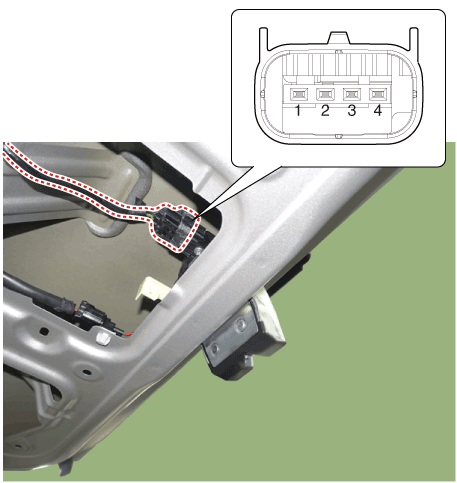
Tailgate Lock Module Inspection
| 1. |
Remove the tailgate trim.
(Refer to Body - "Tailgate Trim")
|
| 2. |
Disconnect the connector from the actuator.
|
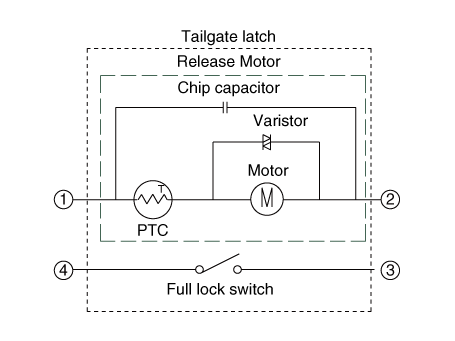
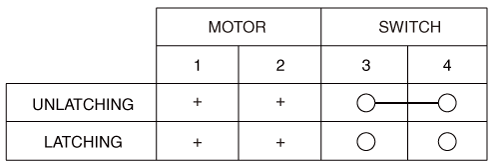
| 3. |
Check actuator operation by connecting power and ground according to
the table. To prevent damage to the actuator, apply battery voltage
only momentarily.
|
Hood Switch
| 1. |
Disconnect the connector (A) and bolts from the hood switch.
|
| 2. |
Check for continuity between the terminals and ground according to the
table.
|
 Components and components location
Component Location
1. Driver power window main switch
2. Assist power window main switch
3. ICU junction block
4. Door lock knob
5...
 Power Door Lock Switch. Repair procedures
Diagnosis with GDS
1.
In the body electrical system, failure can be quickly diagnosed by using
the vehicle diagnostic system (Diagnostic tool)...
Other information:
Hyundai Venue (QX) (2020-2025) Service Manual: Hood Assembly. Components and components location
..
Hyundai Venue (QX) (2020-2025) Owners Manual: Lane Keeping Assist (LKA)
Lane Keeping Assist system helps detect lane markers on the road with a camera at the front windshield, and assists the driver's steering to help keep the vehicle between lanes. When the system detects the vehicle straying from its lane, it alerts the driver with a visual and audible warning, while applying a slight countersteering torque, to try to help prevent the vehicle from moving out of its lane...
Categories
- Manuals Home
- 1st Generation Venue Owners Manual
- 1st Generation Venue Service Manual
- Operating Door Locks from Outside the Vehicle
- Check Tire Pressure
- Rear Combination Light Bulb Replacement
- New on site
- Most important about car
Head Restraints
The vehicle’s front and rear seats have adjustable head restraints. The head restraints provide comfort for passengers, but more importantly they are designed to help protect passengers from whiplash and other neck and spinal injuries during an accident, especially in a rear impact collision.
WARNING
To reduce the risk of serious injury or death in an accident, take the following precautions when adjusting your head restraints:
Always properly adjust the head restraints for all passengers BEFORE starting the vehicle. NEVER let anyone ride in a seat with the head restraints removed or reversed.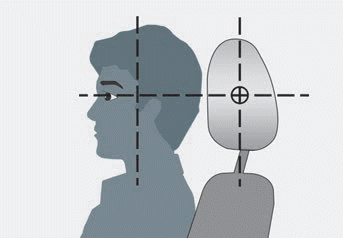
Copyright © 2025 www.hvenueqx.com

