Hyundai Venue: Ignition Lock Switch / Clutch Tube. Repair procedures
Hyundai Venue (QX) (2020-2025) Service Manual / Clutch System / Ignition Lock Switch / Clutch Tube. Repair procedures
| Removal |
| 1. |
Turn ignition switch OFF and disconnect the negative (-) battery cable.
|
| 2. |
Remove the air cleaner and air duct.
|
| 3. |
Remove the battery (+) terminal (A).
|
| 4. |
Remove the battery mounting bracket (A) and the battery (B).
|
| 5. |
Remove the ECM.
|
| 6. |
Remove the battery tray.
|
| 7. |
Remove the snap pin (A) and then separate the clutch tube (B).
|
| 8. |
Loosen the clutch tube bracket bolts (A).
|
| 9. |
Remove the snap pin (A) and then separate the clutch hose & tube (B).
|
| 10. |
Remove the clutch hose & tube from the vehicle.
|
| Installation |
| 1. |
To install, reverse the removal procedures.
|
| 2. |
Perform bleeding air procedure in concecntric slave cylinder after pouring
the brake fluid.
(Refer to Clutch System - "Concentric Slave Cylinder Assembly")
|
 Clutch Tube. Components and components location
Components
1. Clutch pedal assembly
2. Clutch pedal arm
3. Ignition lock & clutch switch
4. Clutch master cylinder
5...
 Clutch Master Cylinder. Components and components location
Components
1. Clutch pedal assembly
2. Clutch pedal arm
3. Ignition lock & clutch switch
4. Clutch master cylinder
5...
Other information:
Hyundai Venue (QX) (2020-2025) Service Manual: Output Speed Sensor. Repair procedures
Removal • When Diagnostic Trouble Codes (DTC) is on, perform the following procedure to replace it. • Automatic transaxle is composed of delicate components...
Hyundai Venue (QX) (2020-2025) Service Manual: Engine Mounting. Components and components location
..
Categories
- Manuals Home
- 1st Generation Venue Owners Manual
- 1st Generation Venue Service Manual
- Operating Door Locks from Outside the Vehicle
- To set Cruise Control speed
- Warning and Indicator Lights
- New on site
- Most important about car
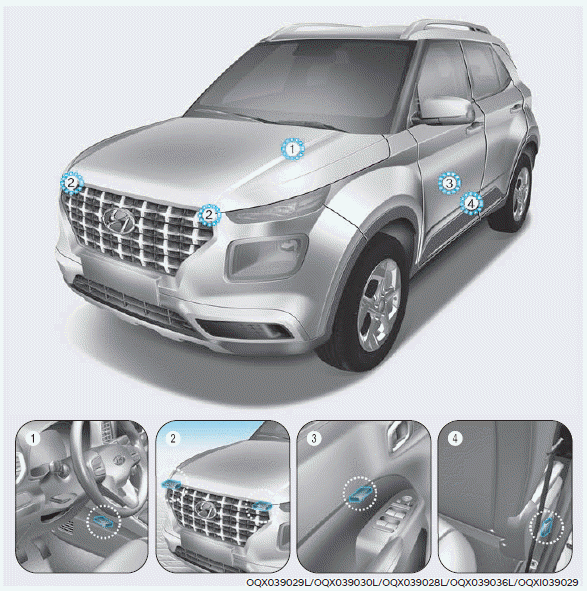
Air bag collision sensors
WARNING
To reduce the risk of an air bag deploying unexpectedly and causing serious injury or death:
Do not hit or allow any objects to impact the locations where air bags or sensors are installed. Do not perform maintenance on or around the air bag sensors. If the location or angle of the sensors is altered, the air bags may deploy when they should not or may not deploy when they should. Do not install bumper guards or replace the bumper with a nongenuine HYUNDAI parts. This may adversely affect the collision and air bag deployment performance. Place the ignition switch in the LOCK/OFF or ACC position when the vehicle is being towed to prevent inadvertent air bag deployment. Have all air bag repairs conducted by an authorized HYUNDAI dealer.
Copyright © 2025 www.hvenueqx.com


