Hyundai Venue: Automatic Transaxle Control System / Output Speed Sensor. Repair procedures
| • |
When Diagnostic Trouble Codes (DTC) is on, perform the following
procedure to replace it.
|
| • |
Automatic transaxle is composed of delicate components. Be careful
not to cause any damage on the component in the course of assembly
and disassembly.
|
| • |
Maintain clean condition so that foreign substance does not
get into the automatic transaxle.
|
| • |
Use a coated apron, latex gloves, and stainless tray to prevent
foreign substance from getting into the transaxle.
|
| • |
Automatic transaxle fluid (ATF) can be reused. Collect it using
a clean 10-liter beaker.
|
|
| 1. |
Turn ignition switch OFF and disconnect the negative (-) battery cable.
|
| 2. |
Remove the air cleaner and air duct.
| (1) |
Remove the air duct (A).

|
| (2) |
Disconnect the breather hose (B) and air intake hose (C).
|
| (3) |
Remove the air cleaner assembly (D).
|
Tightening torque :
Hose clamp bolt (C):
2.9 - 4.9 N.m (0.3 - 0.5 kgf.m, 2.1 - 3.6 lb-ft)
Air cleaner assembly bolts (D) :
3.9 - 5.9 N.m (0.4 - 0.6 kgf.m, 2.9 - 4.3 Ib-ft)
|

|
|
| 3. |
Remove the battery (+) terminal (A).
|
Tightening torque :
7.8 - 9.8 N.m (0.8 - 1.0 kgf.m, 5.8 - 7.2 lb-ft)
|

|
| 4. |
Remove the battery mounting bracket (A) and the battery (B).
|
Tightening torque :
9.0 - 14.0 N.m (0.9 - 1.4 kgf.m, 6.6 - 10.3 Ib-ft)
|

|
| 5. |
Remove the ECM.
| (1) |
Disconnect the ECM connector (A).
|
| (2) |
Loosen the mounting bolts (B) and then removing the ECM bracket
assembly.
|
|
Tightening torque :
9.8 - 11.8 N.m (1.0 - 1.2 kgf.m, 7.2 - 8.7 lb-ft)
|

|
| 6. |
Remove the battery tray.
| (1) |
Loosen the mounting bolt (A) and then removing the battery (+)
terminal bracket.
|
Tightening torque :
8.0 - 10.0 N.m (0.8 - 1.0 kgf.m, 5.9 - 7.4 lb-ft)
|

|
| (2) |
Loosen the bolts and then removing the battery tray (A).
|
Tightening torque :
8.8 - 13.7 N.m (0.9 - 1.4 kgf.m, 6.5 - 10.1 Ib-ft)
|

|
|
| 7. |
Remove the drain plug (A) and drain the ATF totally and then reinstall
the drain plug.

| •
|
Replace the gasket before reinstalling the drain plug.
|
| •
|
After the installation, start the engine and then check
if there are any leakages from the drain plug.
|
|
|
| 8. |
Remove the wiring mounting clip (A).
|
| 9. |
Disconnect the air breather hose (B) from the valve body cover.
|
Tightening torque :
9.8 - 11.8 N.m (1.0 - 1.2 kgf.m, 7.2 - 8.7 lb-ft)
|

|
| 10. |
Disconnect the hose (A) after removing the automatic transaxle fluid
cooler hose clamp.

| •
|
Carefully install the clamp not to damage the hose.
|
| •
|
Install the clamp in a correct direction not to be interfered
with other parts.
|
| •
|
After the installation, start the engine and then check
if there are any leakages from the hose.
|
|
|
| 11. |
Remove the valve body cover (A).
|
Tightening torque :
11.8 - 13.7 N.m (1.2 - 1.4 kgf.m, 8.7 - 10.1 lb-ft)
|


| •
|
Replace the gasket (A) before reinstalling the valve
body cover.

|
| •
|
After the installation, start the engine and then check
if there are any leakages from the valve body cover.
|
|
|
| 12. |
Disconnect the oil temperature sensor and solenoid valve connector (A)
from the valve body.
|
Tightening torque :
9.8 - 11.8 N.m (1.0 - 1.2 kgf.m, 7.2 - 8.7 lb-ft)
|

| •
|
Check for the looseness, poor connection, bending, corrosion,
contamination, deterioration, or damage before reinstalling
the solenoid valve connector.
|
|
|
| 13. |
Remove the valve body assembly (A).
|
Tightening torque :
9.8 - 11.8 N.m (1.0 - 1.2 kgf.m, 7.2 - 8.7 lb-ft)
|

|
| 14. |
Disconnect the input & output speed sensor connector (A).

|
| 15. |
Remove the input & output speed sensor (A) after removing the bolts(2ea).
|
Tightening torque :
9.8 - 11.8 N.m (1.0 - 1.2 kgf.m, 7.2 - 8.7 lb-ft)
|

|
| 1. |
To install, reverse the removal procedure.
|
| 2. |
Check fluid level after filling the automatic transaxle with fluid.
(Refer to Automatic Transaxle Syatem - "Automatic Transaxle Fluid (ATF)")
| 1) |
After ATF level check or exchange, be sure to remove
residual ATF on transaxle case.
(Be especially sure to remove residual ATF between automatic
transaxle case and valve body cover)
|
| 2) |
After installing the valve body cover, make sure to
check the oil leakage at the connection area with the
engine ON.
|
|
|
Specifications
▷ Type : Hall effect sensor
▷ Specifications
Items
Specifications
Operation condition [°C(°F)]
(-40 to 150) -40 to 302
Output voltage(V)
High
1...
Description
•
The inhibitor switch mounted on the upper of transaxle and connected
with shifter lever.
•
The inhibitor switch has four points of contact and it makes the signals(S1,
S2, S3, S4)...
Other information:
Removal
1.
Disconnect the negative (-) battery terminal.
2.
Remove the crashpad lower panel.
(Refer to BODY - "Crashpad Lower Panel")
3.
Disconnect the SSB connector (A)...
..
Categories
Seat belt warning light (for driver’s seat)
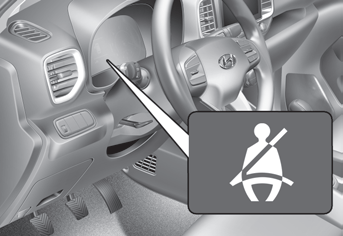
As a reminder to the driver, the seat belt warning light will illuminate for
approximately 6 seconds each time you place the ignition switch to the ON position
regardless of belt fastening. However, if the seat belt is unfasted, a warning chime
will sound for approximately 6 seconds.
read more


 Output Speed Sensor. Specifications
 Inhibitor Switch. Description and operation