Hyundai Venue: Manual Transaxle System / Back-up Lamp Switch. Repair procedures
| 1. |
Turn OFF ignition switch and disconnect the negative (-) battery cable.
|
| 2. |
Remove the air cleaner and air duct.
| (1) |
Remove the air duct (A).

|
| (2) |
Disconnect the breather hose (B) and air intake hose (C).
|
| (3) |
Remove the air cleaner assembly (D).
|
Tightening torque :
Hose clamp bolt (C):
2.9 - 4.9 N.m (0.3 - 0.5 kgf.m, 2.1 - 3.6 lb-ft)
Air cleaner assembly bolts (D) :
3.9 - 5.9 N.m (0.4 - 0.6 kgf.m, 2.9 - 4.3 Ib-ft)
|

|
|
| 3. |
Remove the battery (+) terminal (A).
|
Tightening torque :
7.8 - 9.8 N.m (0.8 - 1.0 kgf.m, 5.8 - 7.2 lb-ft)
|

|
| 4. |
Remove the battery mounting bracket (A) and the battery (B).
|
Tightening torque :
9.0 - 14.0 N.m (0.9 - 1.4 kgf.m, 6.6 - 10.3 Ib-ft)
|

|
| 5. |
Remove the ECM.
| (1) |
Disconnect the ECM connector (A).
|
| (2) |
Loosen the mounting bolts (B) and then removing the ECM bracket
assembly.
|
|
Tightening torque :
9.8 - 11.8 N.m (1.0 - 1.2 kgf.m, 7.2 - 8.7 lb-ft)
|

|
| 6. |
Remove the battery tray.
| (1) |
Loosen the mounting bolt (A) and then removing the battery (+)
terminal bracket.
|
Tightening torque :
8.0 - 10.0 N.m (0.8 - 1.0 kgf.m, 5.9 - 7.4 lb-ft)
|

|
| (2) |
Loosen the bolts and then removing the battery tray (A).
|
Tightening torque :
8.8 - 13.7 N.m (0.9 - 1.4 kgf.m, 6.5 - 10.1 Ib-ft)
|

|
|
| 7. |
Disconnect the back-up lamp switch connector (A).

|
| 8. |
Check the continuity between no. 1 and 2 terminals of backup lamp switch.
When the shift lever is in reverse, there should be continuity.

|
| 1. |
Turn OFF ignition switch and disconnect the negative (-) battery cable.
|
| 2. |
Remove the air cleaner and air duct.
| (1) |
Remove the air duct (A).

|
| (2) |
Disconnect the breather hose (B) and air intake hose (C).
|
| (3) |
Remove the air cleaner assembly (D).
|
Tightening torque :
Hose clamp bolt (C):
2.9 - 4.9 N.m (0.3 - 0.5 kgf.m, 2.1 - 3.6 lb-ft)
Air cleaner assembly bolts (D) :
3.9 - 5.9 N.m (0.4 - 0.6 kgf.m, 2.9 - 4.3 Ib-ft)
|

|
|
| 3. |
Remove the battery (+) terminal (A).
|
Tightening torque :
7.8 - 9.8 N.m (0.8 - 1.0 kgf.m, 5.8 - 7.2 lb-ft)
|

|
| 4. |
Remove the battery mounting bracket (A) and the battery (B).
|
Tightening torque :
9.0 - 14.0 N.m (0.9 - 1.4 kgf.m, 6.6 - 10.3 Ib-ft)
|

|
| 5. |
Remove the ECM.
| (1) |
Disconnect the ECM connector (A).
|
| (2) |
Loosen the mounting bolts (B) and then removing the ECM bracket
assembly.
|
|
Tightening torque :
9.8 - 11.8 N.m (1.0 - 1.2 kgf.m, 7.2 - 8.7 lb-ft)
|

|
| 6. |
Remove the battery tray.
| (1) |
Loosen the mounting bolt (A) and then removing the battery (+)
terminal bracket.
|
Tightening torque :
8.0 - 10.0 N.m (0.8 - 1.0 kgf.m, 5.9 - 7.4 lb-ft)
|

|
| (2) |
Loosen the bolts and then removing the battery tray (A).
|
Tightening torque :
8.8 - 13.7 N.m (0.9 - 1.4 kgf.m, 6.5 - 10.1 Ib-ft)
|

|
|
| 7. |
Disconnect the back-up lamp switch connector (A).

|
| 8. |
Remove the snap pin (A) and then separate the shift cable (B).

|
| 9. |
Replace a new one and install the back up lamp switch (A).
|
Tightening torque :
39.2 - 58.8 N.m (4.0 - 6.0 kgf.m, 28.9 - 43.4 lb-ft)
|

|
Specification
Item
Specification
Current voltage
13V
Working voltage
DC 10V - 15V
Working temperature
(-)30°C ~ (+)100°C
Voltage drop
Max...
Other information:
Curtain air bags are located along both sides of the roof rails above the front
and rear doors.
They are designed to help protect the heads of the front seat occupants and the
rear outboard seat occupants in certain side impact collisions.
The curtain air bags are designed to deploy during certain side impact collisions,
depending on the crash severity...
..
Categories
Seat belt warning light (for driver’s seat)
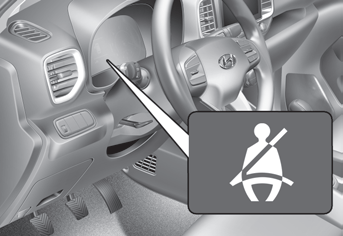
As a reminder to the driver, the seat belt warning light will illuminate for
approximately 6 seconds each time you place the ignition switch to the ON position
regardless of belt fastening. However, if the seat belt is unfasted, a warning chime
will sound for approximately 6 seconds.
read more
 Back-up Lamp Switch. Specifications
