Hyundai Venue: Roof Trim / Roof Trim Assembly. Repair procedures
Hyundai Venue (QX) (2020-2025) Service Manual / Body (Interior and Exterior) / Roof Trim / Roof Trim Assembly. Repair procedures
| Replacement |
|
| 1. |
Remove the front seat.
(Refer to Front Seat - "Front Seat Assembly")
|
| 2. |
Remove the rear seat.
(Refer to Rear Seat - "Rear Seat Assembly")
|
| 3. |
Remove the front pillar trim.
(Rear to Interior Trim - "Front Pillar Trim")
|
| 4. |
Remove the center pillar lower trim.
(Rear to Interior Trim - "Center Pillar Trim")
|
| 5. |
Remove the center pillar upper trim.
(Rear to Interior Trim - "Center Pillar Trim")
|
| 6. |
Remove the rear pillar trim.
(Rear to Interior Trim - "Rear Pillar Trim")
|
| 7. |
Remove the sunvisor and retainer.
(Rear to Roof Trim - "Sunvisor")
|
| 8. |
Remove the assist handle.
(Rear to Roof Trim - "Assist Handle")
|
| 9. |
Remove the overhead console lamp.
(Rear to Body Electrical System - "Overhead Console Lamp")
|
| 10. |
Remove the room lamp.
(Rear to Body Electrical System - "Room Lamp")
|
| 11. |
Remove the tailgate weatherstrip.
(Refer to Tailgate - "Tailgate Weatherstrip")
|
| 12. |
Separate the roof trim main connector (A) and the mounting clips in
the front pillar.
|
| 13. |
Remove the roof trim mounting clip and remove the roof trim assembly
(A).
|
| 14. |
Press the lock pin and separate the sunroof motor connector (A).
|
| 15. |
Remove the roof trim assembly (A) from the vehicle through the tailgate.
|
| 16. |
Remove roof trim wiring harness from the roof trim.
|
| 17. |
To install, reverse removal procedure.
|
Other information:
Hyundai Venue (QX) (2020-2025) Service Manual: Repair procedures
Adjustment Glass Adjustment • Check the glass run channel for damage or deterioration, and replace it if necessary. 1...
Hyundai Venue (QX) (2020-2025) Service Manual: Schematic diagrams
..
Categories
- Manuals Home
- 1st Generation Venue Owners Manual
- 1st Generation Venue Service Manual
- Liftgate
- Warning and Indicator Lights
- System Setting and Activation
- New on site
- Most important about car
Head Restraints
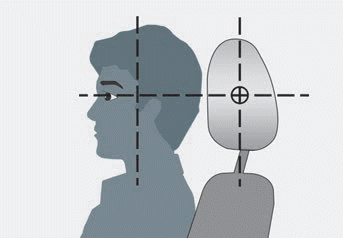
The vehicle’s front and rear seats have adjustable head restraints. The head restraints provide comfort for passengers, but more importantly they are designed to help protect passengers from whiplash and other neck and spinal injuries during an accident, especially in a rear impact collision.
WARNING
To reduce the risk of serious injury or death in an accident, take the following precautions when adjusting your head restraints:
Always properly adjust the head restraints for all passengers BEFORE starting the vehicle. NEVER let anyone ride in a seat with the head restraints removed or reversed.
Copyright © 2025 www.hvenueqx.com


