Hyundai Venue: Rear Door / Rear Door Module. Repair procedures
Hyundai Venue (QX) (2020-2025) Service Manual / Body (Interior and Exterior) / Rear Door / Rear Door Module. Repair procedures
| Replacement |
|

| 1. |
Remove the rear door window glass.
(Refer to Rear Door - "Rear Door Window Glass")
|
| 2. |
Remove the rear door outside handle.
(Refer to Rear Door - "Rear Door Outside Handle")
|
| 3. |
Loosen the rear door outside handle screw (A).
|

| 4. |
Loosen the rear door latch screws.
|

| 5. |
Press the lock pin and separate the rear door main connector (A).
|

| 6. |
Loosen the rear door moodule bolts and remove the rear door module (A).
|

| 7. |
Disconnect the various connector fron the rear door module and separate
the rear door module wiring harness (A).
|
| 8. |
Remove the rear door latch assembly.
(Refer to Rear Door - "Rear Door Latch Assembly")
|
| 9. |
Remove the rear power window motor.
(Refer to Body Electrical System - "Power Window Motor")
|
| 10. |
To install, reverse removal procedure.
|


 Rear Door Inside Handle. Repair procedures
Removal
1.
Remove the front door trim.
(Refer to Front Door - "Front Door Trim")
2.
Cut the heat welds with a knife and remove the front door inside handle
(A)...
Other information:
Hyundai Venue (QX) (2020-2025) Service Manual: Rear Door Module. Components and components location
..
Hyundai Venue (QX) (2020-2025) Owners Manual: FCA Sensor
Front camera In order for FCA system to operate properly, always make sure the front view camera is clean and free of dirt, snow, and debris. Dirt, snow, or foreign substances on the surface may adversely affect the sensing performance of the camera...
Categories
- Manuals Home
- 1st Generation Venue Owners Manual
- 1st Generation Venue Service Manual
- Operating Door Locks from Outside the Vehicle
- Electronic Stability Control (ESC)
- Trip Computer
- New on site
- Most important about car
Master warning mode
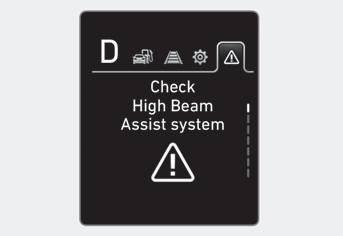
This warning light informs the driver the following situations.
-- Forward Collision-Avoidance Assist system malfunction (if equipped)
-- Forward Collision-Avoidance Assist radar blocked (if equipped)
-- Blind-Spot Collision Warning system malfunction (if equipped)
-- Blind-Spot Collision Warning radar blocked (if equipped)
-- Lamp malfunction (if equipped)
-- High Beam Assist malfunction (if equipped)
-- Tire Pressure Monitoring System (TPMS) malfunction (if equipped)

Copyright © 2025 www.hvenueqx.com