Hyundai Venue: Front Seat / Front Seat Shield Outer Cover. Repair procedures
Hyundai Venue (QX) (2020-2025) Service Manual / Body (Interior and Exterior) / Front Seat / Front Seat Shield Outer Cover. Repair procedures
| Replacement |
|

| 1. |
Remove the front seat assembly.
(Refer to Front Seat - "Front Seat Assembly")
|
| 2. |
Using a remover and remove the front seat height nob cap (A).
|

| 3. |
Loosen the mounting screws and remove the front seat height nob (A).
|

| 4. |
Loosen the mounting screw and remove the front seat recliner lever (A).
|

| 5. |
Remove the front seat outer shield cover (A) by pulling forward in the
direction of the arrow using screw driver or remover.
|

| 6. |
To install, reverse removal procedure.
|


Other information:
Hyundai Venue (QX) (2020-2025) Service Manual: Description and operation
Description System Overview The System offers the following features: – Human machine interface through a 1-stage button, for terminal switching and engine start. – Control of external relays for ACC / IGN1 / IGN2 terminal switching and STARTER, without use of mechanical ignition switch...
Hyundai Venue (QX) (2020-2025) Service Manual: General information
Tightening Torque Table of Standard Parts BOLT (Nominal diameter) NUT (Nominal diameter) BOLT/NUT Normal screw Torque Nm (kg.m, Ib-ft) Nominal diameter...
Categories
- Manuals Home
- 1st Generation Venue Owners Manual
- 1st Generation Venue Service Manual
- Rear Combination Light Bulb Replacement
- Warning and Indicator Lights
- Immobilizer System
- New on site
- Most important about car
Master warning mode
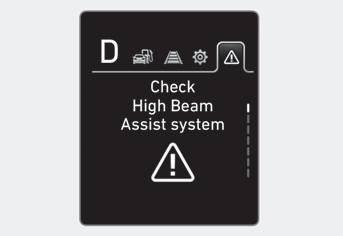
This warning light informs the driver the following situations.
-- Forward Collision-Avoidance Assist system malfunction (if equipped)
-- Forward Collision-Avoidance Assist radar blocked (if equipped)
-- Blind-Spot Collision Warning system malfunction (if equipped)
-- Blind-Spot Collision Warning radar blocked (if equipped)
-- Lamp malfunction (if equipped)
-- High Beam Assist malfunction (if equipped)
-- Tire Pressure Monitoring System (TPMS) malfunction (if equipped)

Copyright © 2025 www.hvenueqx.com