Hyundai Venue: Airbag Module / Driver Airbag (DAB) Module and Clock Spring. Repair procedures
Hyundai Venue (QX) (2020-2025) Service Manual / Restraint / Airbag Module / Driver Airbag (DAB) Module and Clock Spring. Repair procedures
| Removal |
| 1. |
Disconnect the battery negative cable and wait for at least three minutes
before beginning work.
|
| 2. |
Remove the driver airbag module mounting bolts.
|

| 3. |
Disconnect the DAB connector (A).
|

| 4. |
Remove the steering wheel.
(Refer to Steering System - "Steering Wheel")
|
| 5. |
Remove the steering wheel and steering wheel column shround
(Refer to Steering System - "Steering Column and Shaft")
|
| 6. |
Remove the clock spring after disconnecting the clock spring connector
(A).
|

| Inspection |
Driver Airbag (DAB)
If any improper parts are found during the following inspection, replace the
airbag module with a new one.
|

| 1. |
Check pad cover for dents, cracks or deformities.
|
| 2. |
Check the airbag module for denting, cracking or deformation.
|
| 3. |
Check hooks and connectors for damage, terminals for deformities, and
harness for binds.
|
| 4. |
Check airbag inflator case for dents, cracks or deformities.
|

| 5. |
Install the airbag module to the steering wheel to check for fit or
alignment with the wheel.
|
Clock Spring
| 1. |
If, as a result of the following checks, even one abnormal point is
discovered, replace the clock spring with a new one.
|
| 2. |
Check connectors and clock spring for damage, and terminals for deformities.
|

| Installation |
| 1. |
Set the front tires straight-ahead.
|
| 2. |
Turn the ignition switch OFF.
|
| 3. |
Disconnect the battery negative cable from the battery and wait for
at least three minutes before beginning the work.
|
| 4. |
Connect the clock spring harness connector and horn harness connector
to the clock spring.
|
| 5. |
Clock spring manual neutral setting procedure.
|


| 6. |
Install the steering wheel column shroud and the steering wheel.
(Refer to Steering System - "Steering Column and Shaft")
|
| 7. |
Connect the Driver Airbag (DAB) module connector and horn connector,
and then install the Driver Airbag (DAB) module on the steering wheel.
|

| 8. |
Connect the battery negative cable.
|
| 9. |
After installing the airbag, confirm proper system operation :
|


Other information:
Hyundai Venue (QX) (2020-2025) Service Manual: Injector. Description and operation
Description Based on information from various sensors, the ECM can calculate the fuel amount to be injected. The fuel injector is a solenoid-operated valve and the fuel injection amount is controlled by length of injection time. The ECM controls each injector by grounding the control circuit...
Hyundai Venue (QX) (2020-2025) Service Manual: Side Airbag (SAB) Module. Repair procedures
Removal 1. Disconnect the battery negative cable and wait for at least 3 minutes before beginning work. 2. Remove the front seat assembly. (Refer to Body - "Front Seat Assembly") 3...
Categories
- Manuals Home
- 1st Generation Venue Owners Manual
- 1st Generation Venue Service Manual
- Theft-Alarm System
- To set Cruise Control speed
- Operating Door Locks from Outside the Vehicle
- New on site
- Most important about car
Seat Belt Warning Light
Seat belt warning light (for driver’s seat)
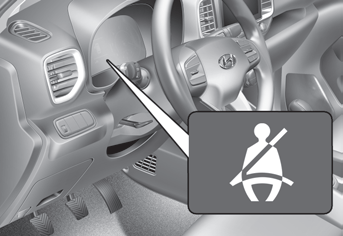
As a reminder to the driver, the seat belt warning light will illuminate for approximately 6 seconds each time you place the ignition switch to the ON position regardless of belt fastening. However, if the seat belt is unfasted, a warning chime will sound for approximately 6 seconds.

Copyright © 2025 www.hvenueqx.com