Hyundai Venue: Interior Trim / Center Pillar Trim. Repair procedures
Hyundai Venue (QX) (2020-2025) Service Manual / Body (Interior and Exterior) / Interior Trim / Center Pillar Trim. Repair procedures
| Replacement |
[Center pillar lower trim]
|

| 1. |
Carefully remove the front door body side weatherstrip.
|
| 2. |
Carefully remove the rear door body side weatherstrip.
|
| 3. |
Remove the front door scuff trim.
(Refer to Interior Trim - "Door Scuff Trim")
|
| 4. |
Remove the rear door scuff trim.
(Refer to Interior Trim - "Door Scuff Trim")
|
| 5. |
Using a screwdriver or remover, remove the center pillar lower trim
(A).
|
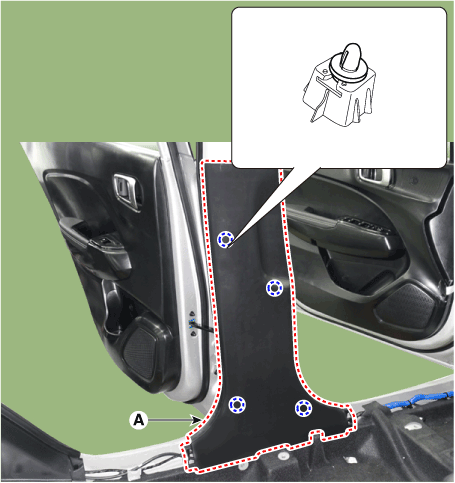
| 6. |
To install, reverse removal procedure.
|

[Center pillar upper trim]
|

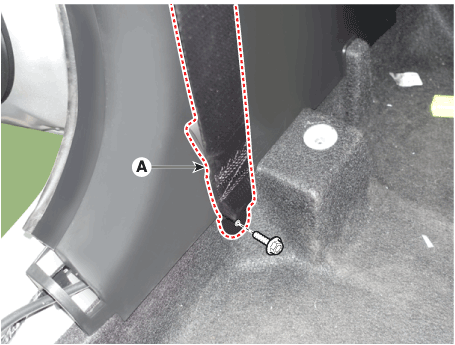
| 1. |
Remove the center pillar lower trim.
(Refer to Interior Trim - "Center Pillar Trim")
|
| 2. |
Loosen the mounting bolt and remove the front seat belt lower anchor
(A).
|
| 3. |
Using a flat-tip screwdriver and remove the center pillar upper trim
(A).
|
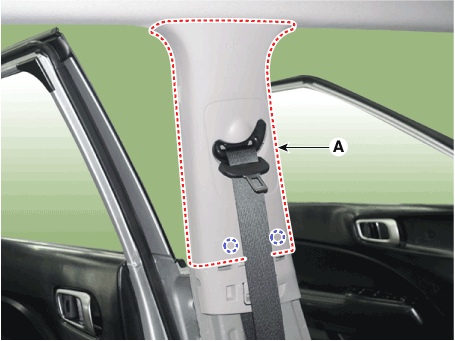
| 4. |
To install, reverse removal procedure.
|


Other information:
Hyundai Venue (QX) (2020-2025) Service Manual: Description and operation
Description Evaporative Emission Control System prevents fuel vapor stored in fuel tank from vaporizing into the atmosphere. When the fuel evaporates in the fuel tank, the vapor passes through vent hoses or tubes to the canister filled with charcoal and the canister temporarily holds the vapor in the charcoal...
Hyundai Venue (QX) (2020-2025) Owners Manual: Braking System
Power Brakes Your vehicle has power-assisted brakes that adjust automatically through normal usage. If the engine is not running or is turned off while driving, the power assist for the brakes will not work. You can still stop your vehicle by applying greater force to the brake pedal than typical...
Categories
- Manuals Home
- 1st Generation Venue Owners Manual
- 1st Generation Venue Service Manual
- Liftgate
- Trip Computer
- Rear Combination Light Bulb Replacement
- New on site
- Most important about car
Head Restraints
The vehicle’s front and rear seats have adjustable head restraints. The head restraints provide comfort for passengers, but more importantly they are designed to help protect passengers from whiplash and other neck and spinal injuries during an accident, especially in a rear impact collision.
WARNING
To reduce the risk of serious injury or death in an accident, take the following precautions when adjusting your head restraints:
Always properly adjust the head restraints for all passengers BEFORE starting the vehicle. NEVER let anyone ride in a seat with the head restraints removed or reversed.

Copyright © 2025 www.hvenueqx.com