Hyundai Venue: Restraint / Description and operation
Hyundai Venue (QX) (2020-2025) Service Manual / Restraint / Description and operation
| Warning Lamp Activation |
Warning Lamp Behavior after Ignition On
As soon as the operating voltage is applied to the SRSCM ignition input, the
SRSCM activates the warning lamp for a LED lamp check.
The lamp shall turn on for 6 seconds during the initialization phase and be
turned off afterward.
To alert the driver, the warning lamp shall turn on for 6 seconds and off for
one second then on continuously after the operating voltage is applied if any
active fault exists.
| 1. |
Active fault.
|
| 2. |
Normal or historical fault only exist.
|
| 3. |
When turning the ignition switch ON during variant coding (EOL) mode,
the airbag warning lamp is turned on and blinks at intervals of 1 second
till the coding is completed.
If the variant coding is completed normally, the airbag warning lamp
will turn on for 6 seconds, and then turned off. Otherwise the airbag
warning lamp continuously blinks at intervals of 1 second.
When there is active fault in airbag system or SRSCM internal fault,
the variant coding (EOL) cannot be completed. In this case, perform
the variant coding (EOL) procedure again after troubleshooting with
the GDS.
|
SRSCM Independent Warning Lamp Activation
There are certain fault conditions in which the SRSCM cannot function and thus
cannot control the operation of the standard warning lamp. In these cases, the
standard warning lamp is directly activated by appropriate circuitry that operates
independently of the SRSCM. These cases are:
| 1. |
Loss of battery supply to the SRSCM : warning lamp turned on continuously.
|
| 2. |
Loss of internal operating voltage : warning lamp turned on continuously.
|
| 3. |
Loss of Microprocessor operation : warning lamp turned on continuously.
|
| 4. |
SRSCM not connected : warning lamp turned on continuously.
|
 General safety information and caution
Precautions
General Precautions
Please read the following precautions carefully before performing the airbag
system service.
Observe the instructions described in this manual, or the airbags could accidentally
deploy and cause damage or injuries...
 Repair procedures
Component Replacement After
Deployment
•
Before doing any SRS repairs, use the GDS Pro to check for DTCs...
Other information:
Hyundai Venue (QX) (2020-2025) Service Manual: Components and components location
..
Hyundai Venue (QX) (2020-2025) Owners Manual: Tilting the sunroof
Tilt the sunroof open: Push the sunroof control lever upward until the sunroof moves to the desired position. To close the sunroof: Push the sunroof control lever forward until the sunroof moves to the desired position. NOTICE Periodically remove any dirt that may accumulate on the sunroof guide rail or between the sunroof and roof panel which can make a noise...
Categories
- Manuals Home
- 1st Generation Venue Owners Manual
- 1st Generation Venue Service Manual
- Operating Door Locks from Outside the Vehicle
- Electronic Stability Control (ESC)
- Liftgate
- New on site
- Most important about car
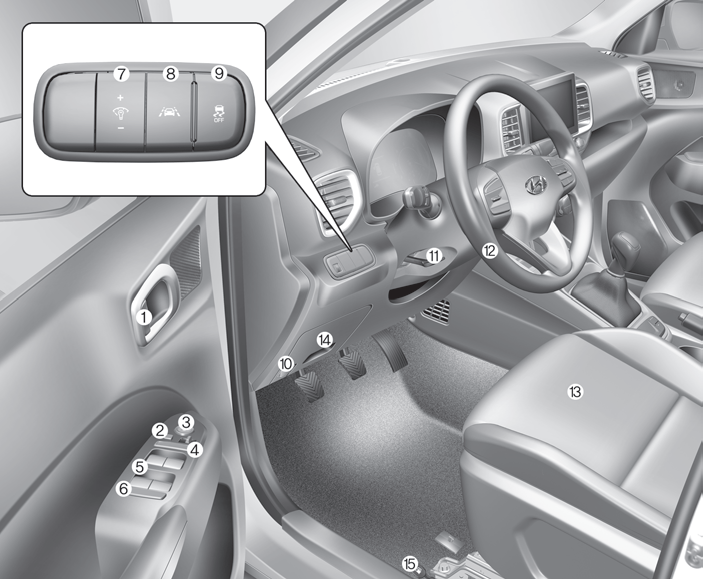
Interior Overview

1. Door lock/unlock button
2. Outside rearview mirror control switch
3. Central door lock switch
4. Power window switches
5. Power window lock switch
Copyright © 2025 www.hvenueqx.com


